How to Easily Record Your Screen on an iPad
Terry VanNoy
PD Specialist
Blog
When using an iPad during teaching, or having students do iPad-related activities, making tutorial videos and demonstrations can help greatly. The “Screen Recording” tool on iOS devices, such as iPhones and iPads, is a relatively new feature that can be very effective. Take a look below at how to set it up, make a recording, and consider other classroom ideas.
Enabling iPad the Screen Share Tool:
- Go to Settings then Control Center.
- Check to see if “Screen Recording” is showing in the “Included Controls” section. If so, you already have this feature enabled. If not, go to “More Controls” and tap the “+” icon to add “Screen Recording” to your Control Center window.
- Now, you should see the “Screen Recording” icon when you swipe down on your home screen from the upper right edge.


Making a Screen Recording:
- Swipe down on your iPad screen to show the Control Center window.
- Press and hold the “Screen Recording” icon.
- Turn on your microphone. It may be muted by default upon first use.
- Choose the save location (we recommend your Photos app).
- Tap “Start Recording”. You will see a three second countdown.
- Tap somewhere else on your screen and go to the file/application/website where you want to show something. Talk clearly as you demonstrate things for your video example.
- Note the red recording bar in the upper right corner of your screen. Tap it to stop your recording.
- This video is automatically saved in your Photos app. Go there to check it out!
Trimming Your Video:
- Usually, the first and last parts of your recording will need to be trimmed. Open up your Photos app again and select your recent video.
- In the upper right corner, tap “Edit”.
- See the timeline bar of your video on the bottom edge. Drag the left arrow to the right to trim the beginning, and drag the right arrow to the left to trim the end of your video.
- Choose whether to save your video as a new version or replace the original. Play it to check if your edits are correct.
- Keep your video open on the screen and tap the “Share” icon in the upper right of the screen. You can choose to send a link of your video to yourself or others through a text message (Messages app) or email. From your email, you can then post the video link in Google Classroom or a group email to your parents or students.

Curriculum Connections and Classroom Ideas:
- Make sure your Google Slides, Keynote, PowerPoint or other presentation file is queued up and ready to go before you hit the “Record” button. Run through your presentation as you narrate the content. Try to limit the amount of text on each slide and use your voice to highlight the important information as your viewers read to themselves. Don’t go too fast!
- For highly technical topics such as block programming (Scratch, MakeCode, Sphero Blockly, Ozoblockly), remember to slow your movements and speak clearly. Place your finger on a block and wiggle it a bit to grab the viewer’s attention to that part of the programming space. Consider making your videos no more than 30 seconds or one minute in length. If you have too much to show, divide your content up into smaller videos.
- Math teachers will love recording tutorials when showing how to write out certain types of problems such as equations and graphing. Use applications that have ink and highlighter tools such as “ShowMe” or “Explain Everything”. Remember to verbalize your steps and make sure to explain why you are doing it that way.
- Teachers of all grade levels can use screen recordings to show students procedural steps in working with software and apps.
- Create flipped classroom instructional videos or lesson starters for substitute teachers.
Have fun with iPad Screen Recording to create quick and easy demonstrations for your students. Share your other ideas with us! Email us your classroom success stories and ideas at Training@teachingthings.com or leave a comment down below.
Not only do we provide CTLE-approved professional development, by certified teachers for certified teachers, on all STEM products, but we also have iBlocks – instructional blocks customized to meet the needs of your students. With our help, you’ll be using all the STEM equipment you’ve purchased while delivering lessons far beyond your wildest dreams. Find out more about iBlocks.
For more tips, tricks, and tools for teaching in and out of the classroom, check out more articles on the Teq Talk blog.
We also offer virtual professional development, training, and remote learning support for educators with OTIS for educators. Explore the technology, tools, and strategies that can spark student success — no matter where teaching or learning are happening.
0 thoughts on “How to Easily Record Your Screen on an iPad”
Related Articles & Other Recommended Reading
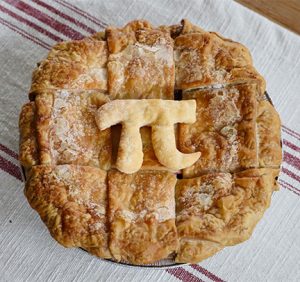
Top 10 Ways to Celebrate Pi Day
Did you know that the first official Pi Day celebration occurred in 1988 at the Exploratorium in San Francisco? In America, we celebrate on March 14th because 3.14 are the first digits of the mathematical constant known as pi. However, in areas such as the United Kingdom, people celebrate on July 22nd. Why? This is […]
7 New PD Courses to Transform Your Classroom for February 2026
Get ready for Digital Learning Day on February 26th! Celebrate with 7 brand-new OTIS courses that make edtech integration easy. From AI-driven lesson planning to interactive classroom tools, master the tech your students love, without the steep learning curve. Here are 7 new PD courses to transform your classroom for February 2026! Check Out What’s […]

Check out our PD Micro-Credential: The Science of Reading
Earlier this year, OTIS for educators launched a PD micro-credential focused on “The Science of Reading.” This 10-part online course takes just under eight hours to complete. “The Science of Reading” micro-credential PD provides participants with a solid foundation of the tenets of reading instruction. We will delve into each component, critical for understanding the […]