Best Practices for Introducing micro:bit to Your Students
Laura Jakubowski
PD Specialist
News

Where do I start?
If you have never used it before, micro:bit can be a bit intimidating (yet incredibly exciting!) for a teacher to introduce to their students. Microsoft’s Make Code software makes it a little less intimidating with its block-based coding format. If you’re familiar with Google Blockly or MIT’s Scratch, it’s a very similar program. It not only has a lot of advanced features hidden in the “more” sections, but for coding newbies, it’s a great place to start. But, once you get the micro:bit and the programming software… how do you teach it?
Start with something flashy
When students are learning a new concept or technology, it is integral to hook them early. Create a spark! Let them have a fun early success that allows them to feel accomplished in the moment, but also dream up possibilities for things they can do next. Also, when starting coding for the first time, it is important to start with something manageable. Remember, learning the concepts of coding is akin to learning a new language. If you start with a concept they already know, like writing their name and showing it on the screen or flashing a pattern in LEDs, it can set a nice base for the students.
I would recommend starting with Flashing Heart, which teaches students to flash the LEDs on the micro:bit. The activity teaches students the concept of a “program” and the difference between starting a program once and looping a program forever. Also, another fun activity is Name Tag, which has a student’s name flash across the micro:bit. I would recommend having the students experiment with placing the blocks in different orders and with blank spaced blocks between them to see how it changes the output on the micro:bit LEDs. Bring on the flash!
Add some variables to the mix
Once students have programming and simple forever loops under their belt, you can start to think about introducing variables and ranges. It creates so many more options! And variety! To begin with the concept of creating a variable, have students Guess the Number with their micro:bit. This design will introduce students to a situation where their microbit has to spit out a random number between the range of 1 and 9. For extra fun trial and error, ask them to use the number 10 too, and then figure out why they get an error code! (Hint: the micro:bit LED display is only so big.) Because the students are working with a range, they need a variable to trigger the decision.
If you want an extension that will also test their conditional knowledge before you cover it, you can extend the idea with a Dice project.
Let’s get conditional
Conditionals are key in basic coding, and if your students have variables down, they are ready to incorporate choices, specifically IF, THEN, ELSE. In this scenario, students will be able to come away with (possibly) multiple variables and multiple outputs on their micro:bit based on the conditions specified. Specifically in Magic 8 Ball or my personal favorite, Rock Paper Scissors, students will be using a range of numbers, and the conditional is reliant on each number being randomly selected at different points to show a different outcome on the micro:bit LED. Sound complicated? Try it out for yourself!
Incorporate student agency
When you have completed all your lessons, my suggestion is to end your curriculum with a bit of student choice. Let them try out a few activities and projects for themselves! If they don’t know everything that’s okay. Let them test their mettle. If they are even more advanced and want to create their own projects, give them a few required elements and then let them try their own. For example, last week I worked with a student who created the Step Counter, but then decided to add more. Once the step counter hit 10,000 she wanted to make it celebrate. She used her knowledge of variables, conditionals, and LEDs to create her celebration with fireworks.
Great places to find other project ideas are the Microsoft website and the BBC website.
Have fun with it, and happy learning to you and your students!
To learn more about teaching students with micro:bit in your classroom, be sure to check out the courses on our online professional development platform, Teq Online PD!
0 thoughts on “Best Practices for Introducing micro:bit to Your Students”
Related Articles & Other Recommended Reading
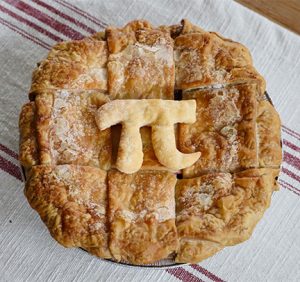
Top 10 Ways to Celebrate Pi Day
Did you know that the first official Pi Day celebration occurred in 1988 at the Exploratorium in San Francisco? In America, we celebrate on March 14th because 3.14 are the first digits of the mathematical constant known as pi. However, in areas such as the United Kingdom, people celebrate on July 22nd. Why? This is […]
7 New PD Courses to Transform Your Classroom for February 2026
Get ready for Digital Learning Day on February 26th! Celebrate with 7 brand-new OTIS courses that make edtech integration easy. From AI-driven lesson planning to interactive classroom tools, master the tech your students love, without the steep learning curve. Here are 7 new PD courses to transform your classroom for February 2026! Check Out What’s […]

Check out our PD Micro-Credential: The Science of Reading
Earlier this year, OTIS for educators launched a PD micro-credential focused on “The Science of Reading.” This 10-part online course takes just under eight hours to complete. “The Science of Reading” micro-credential PD provides participants with a solid foundation of the tenets of reading instruction. We will delve into each component, critical for understanding the […]